Reaction Roles
Updated by Maxime_48 · 1 week ago · 63 views
Reaction Roles lets your members self-assign roles by reacting to a message or clicking a button. You create and publish the panels entirely from the web dashboard.
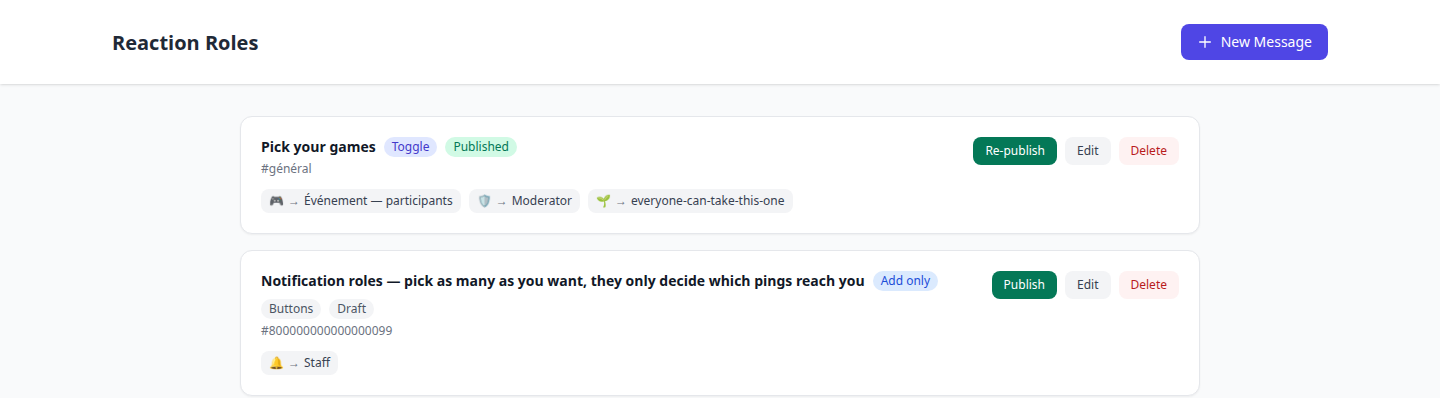
🎭 How it works
- Open the Reaction Roles page and create a panel.
- Write the message content and pick a Discord channel.
- Map emojis to roles.
- Choose a mode, and whether to use buttons or reactions.
- Click Publish — YAWBDB posts the message to Discord instantly.
If you later change the channel or the content, the bot automatically deletes the old message and posts an updated one in the right place.
⚙️ Modes
Four modes control what happens when a member reacts or unreacts.
➕ Add-only
Reacting grants the role. Removing the reaction does nothing.
🔁 Toggle
Reacting grants the role. Removing the reaction removes it.
🎯 Unique
Only one role at a time. Switching reaction removes the previous role and grants the new one.
Useful for color or team roles where a member should hold only one at a time.
✅ Verify
Reacting grants the role permanently. It can never be self-removed.
Useful for rules acceptance — once a member reacts, the role is theirs and stays.
🔘 Buttons vs reactions
Each panel can use either emoji reactions or Discord buttons.
- Button mode replaces reactions with clickable components, each labelled with the emoji and role name.
- Up to 25 roles per panel (5 rows of 5 buttons).
- Confirmation is ephemeral — only the member who clicked sees it.
- All four modes work with both styles.
🗂️ Managing panels
Each panel shows a Draft or Published status.
- Panels stay as drafts until you explicitly publish them — useful for preparing content before it goes live.
- You can create multiple panels per server, each targeting a different channel with its own roles and mode.
⚠️ Role hierarchy
For the bot to assign a role, the bot's highest role must be above the roles it manages in your server's role list.
If members react but no role is granted, this is almost always the cause. See the Bot Permissions troubleshooting page.
👍 Recommended setup
- Create a panel and write a clear message explaining what each reaction does.
- Map each emoji or button to a role.
- Pick a mode that matches the use case (Toggle for opt-in roles, Unique for one-of, Verify for rules).
- Make sure the bot's role sits above the roles you're handing out.
- Publish, then test by reacting yourself.
💡 Best practices
- Use Verify mode for a rules-acceptance gate.
- Use Unique mode for mutually exclusive roles like regions or colors.
- Prefer buttons for clean, labelled panels; use reactions for a more casual look.
- Keep one panel per theme (roles, colors, notifications) rather than one giant panel.